

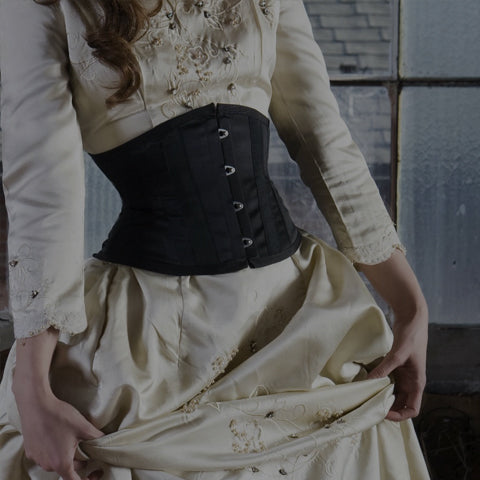
Binding the Edge of a Corset
The following is an excerpt from the book "The Basics of Corset Building", by Linda Sparks. You can order a copy of this book here through our secure shopping cart.
Bias tape can be any width and it’s a simple strip of fabric that has been cut on the bias of the fabric rather than with or across the grain. Some bias tapes come prefolded but you’ll likely make your own so that it matches your corset fabric. Contrasting bias tape can be an attractive and simple design feature and can be made of any fabric.
Bias tape is commonly used to bind the top and bottom edges of a corset to finish these edges. The important characteristic of bias tape is its ability to stretch and shrink to accommodate both concave and convex curves without puckering or pulling. An ordinary ribbon doesn’t respond the same way and can’t be used to bind the curved edges. A cotton or cotton/viscose petersham ribbon will work but you need to be sure it’s a real petersham ribbon and not polyester. Many terms are misused and you may think you’re buying petersham ribbon and it’s not. The right petersham ribbon won’t have smooth selvedges. The edges will be bumpy. If they’re smooth then there is a woven selvedge to stabilize the ribbon and it won’t stretch and shrink as needed. Bias tape will always work and is the best product for the novice corset maker to use.

Test your choice in ribbon before sewing. It should pin neatly into place without puckering or pulling. The visual effect of your bias binding will change with the width of the bias binding you use and the size of the seam allowance. You’ll get a wider flatter look if you use a wider bias binding. Sew a ½” (13mm) seam allowance and don’t trim it down, and you’ll get a smaller more three-dimensional look if you use narrower binding, or trim the seam allowance down and use the double bias method.
Making Your Own Bias Tape
This is simple if you have the right tools: a two-inch wide see-through ruler and rotary cutter or scissors.
First: Do the Math!
For Single Bias Binding
Bias tape needs to be at least four times the desired finished width of the binding. Add ¼” (6mm) to 3/8” (9mm) total to help with the stretching and easing you may have to accommodate when binding curves.

For Double Bias Binding
Bias tape needs to be at least six times the desired finished width of the binding. Add ¼” (6mm) to 3/8” (9mm) total to help with the stretching and easing you may have to accommodate when binding curves.

- Decide on the width of bias tape you want. This depends on your seam allowance at top and bottom, what kind of effect you want, and which method of binding you choose, either single or double. Assuming the seam allowance is ½” (13mm) and you’re using the single bias method, then you’ll need bias tape that is at least 2” (50mm) wide plus 1/4” (6mm) for a total width of 2 ¼” or 56mm.
- Spread your fabric out on the table. It should be pressed and wrinkle free. Your see-through ruler should have small squares on it and you can line these squares up with the selvedge so it is running diagonally through the squares.
- Use disappearing ink or chalk to draw the lines on both sides of the ruler for the first strip and use one of these lines to line up your ruler for the next strip. Repeat to get the number of strips you require.

Note: You may want to measure the lengths of the top and bottom edges to see what lengths you’ll need. If the lengths are longer than what you can get in one piece of bias tape, then you’ll need to piece the bias tape before sewing it onto your corset.
- Cut the bias strips along the lines you have drawn
- If you need to piece them together do so by using the angles already found at either end. Don’t cut these angles off as you need to sew the pieces together on the bias to keep the stretch characteristic.

Applying Bias Tape
There are two basic methods of applying bias tape to a garment; single and double binding. Double binding is sometimes known as French binding.
Single Binding

- With right sides together and raw edges aligned stitch the bias tape to the edge of the corset, having folded back the end of the tape so that it will be encased within the bias binding when finished. You’re stitching along the seam line.
- Flip the bias tape over the seam allowance.
- Press the bias tape seam.
- Fold the raw edge of the bias tape toward the raw edge of the corset.
- Roll the folded bias tape over the seam allowance so that the folded edge is on your stitching line that attached the bias tape to the corset.
- Hand stitch the folded edge into place.

Double Binding

- Fold the bias tape down the center lengthwise, wrong sides together, raw edges together.
- Place the bias tape on the edge of the corset (right sides together) with the raw edges of the bias tape lined up with the raw edge of the corset. Fold back the front and back ends so they will be encased in the bias tape once it’s sewn into place. Stitch the bias tape to the corset along the seam line, stitching through both layers of bias tape and the corset.
- Flip the bias tape toward the raw edges and roll it over the edge to the inside of the corset. The folded edge should come to the stitching line you have just sewn.
- Hand stitch the folded edge of the bias tape in place.

Both methods have been illustrated using 2” wide bias tape, a common size available for purchase at most retail stores.


Making and Applying Petersham Ribbon
Petersham ribbon can also, be used to bind your corset edges and is even simpler to use than bias tape. Petersham ribbon can be difficult to find and good color matches may be impossible so bias is often a better choice as it can be made out of the same fabric as your ) corset.
If you do choose to use Petersham ribbon the 25mm (1'') wide size is a good choice.
- Cut a length of Petersham ribbon the length of the edge you need to bind plus 25mm (1") The 1'' is to allow both ends to be tucked back by 1 13mm (1/2") each.
- Press the Petersham ribbon in half length wise.
- Fold one end of the ribbon under by 13mm ( 1/2" )
- Start pinning the ribbon in place.
- When you get to the opposite end fold it under. The ends should line up with the front and back edges of the corset.
- Machine stitch the ribbon, with right side of corset up, catching both edges of ribbon on the right side and the wrong side. Be very careful not to hit a bone!
You can hand stitch this if you are unsure about catching the edges of the ribbon on both right and wrong sides.
Leave a comment
All comments are moderated before being published.
This site is protected by hCaptcha and the hCaptcha Privacy Policy and Terms of Service apply.