

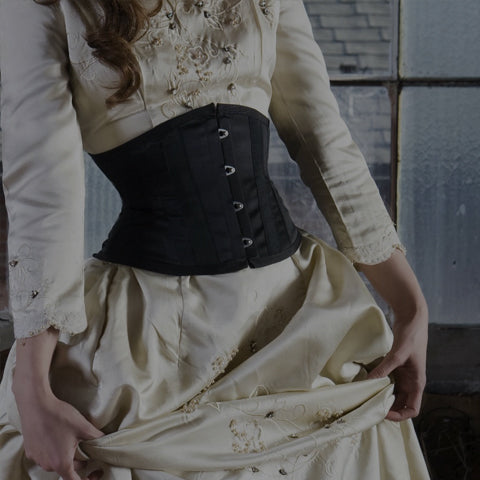

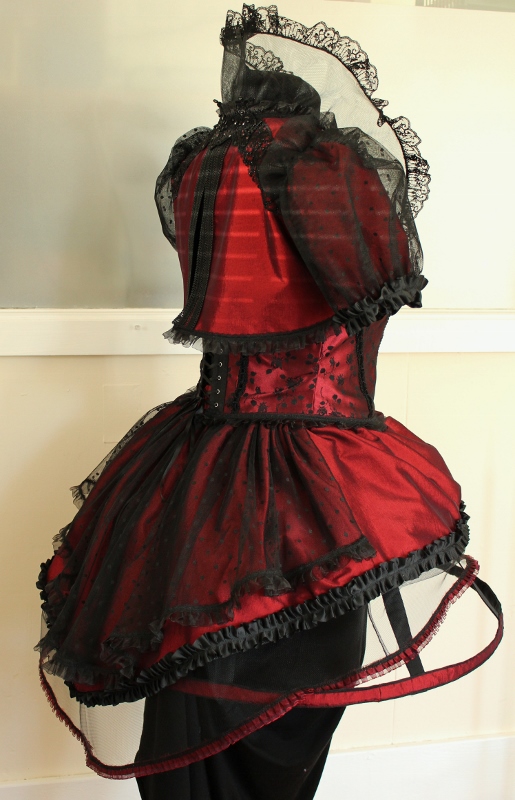
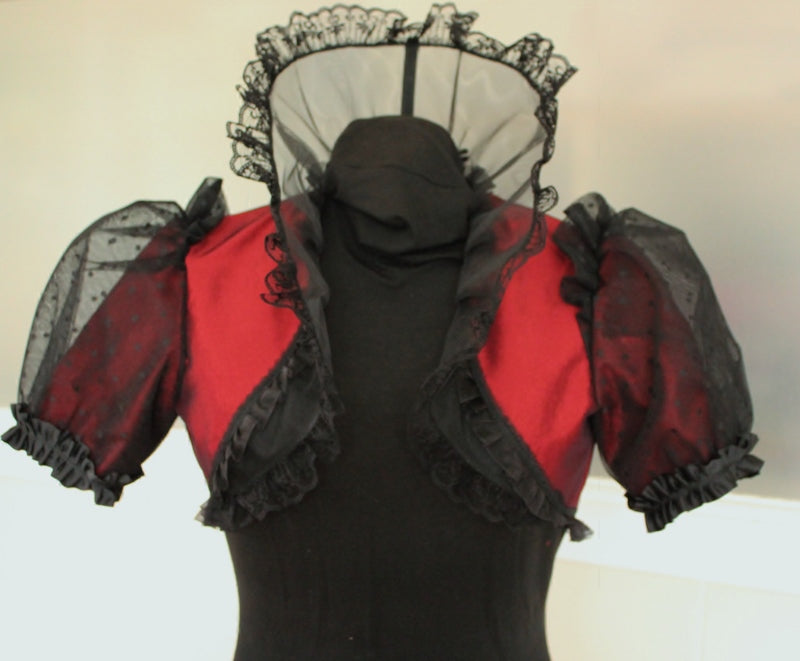
I've outlined briefly my how I made the corset and bolero in two early blog posts. I have really enjoyed making all the pieces of this costume.
For the skirt I opted to use a layer of tutu net from Farthingales for the longer layer and the red/black light weight shot taffeta (from www.voguefabricsstore.com) for the shorter top layer. They get sewn together and gathered into the same waistband, which I made in the same red/black shot taffeta - the lower binding of the corset was done in the same fabric so they blended well. I added a third layer of dotted net (which also came from Vogue Fabrics) and modified the long back skirt pattern piece to get the shape you see here. I included it with the other layers when I attached them to the waistband. Why did I add this third layer? Because I could :-)
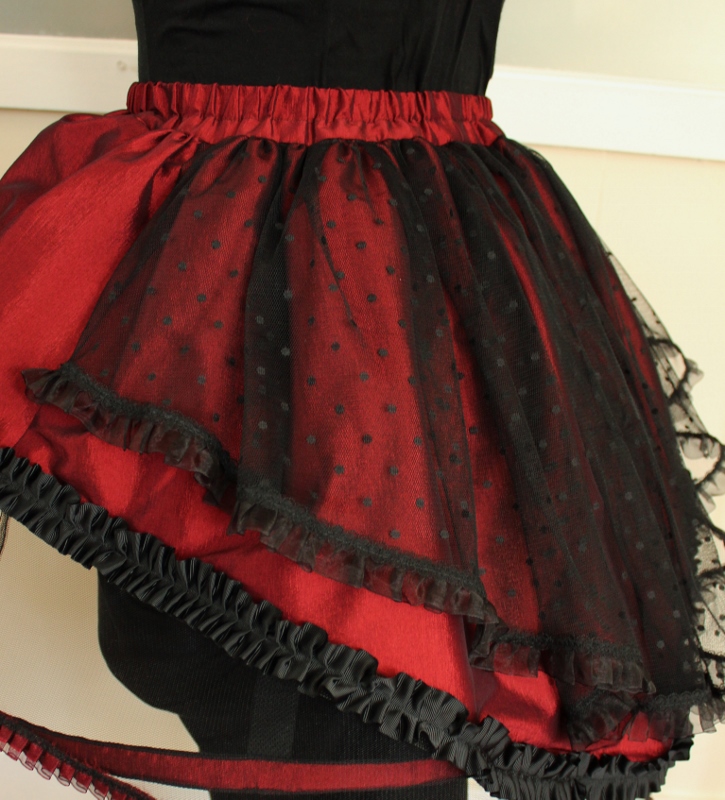
I like how the three different fabrics work together with the lovely light net draping over the red layer, I almost wish I'd used it on the front too. Note, the dotted net is sewn into the side seam of the skirt in order to keep it in place.
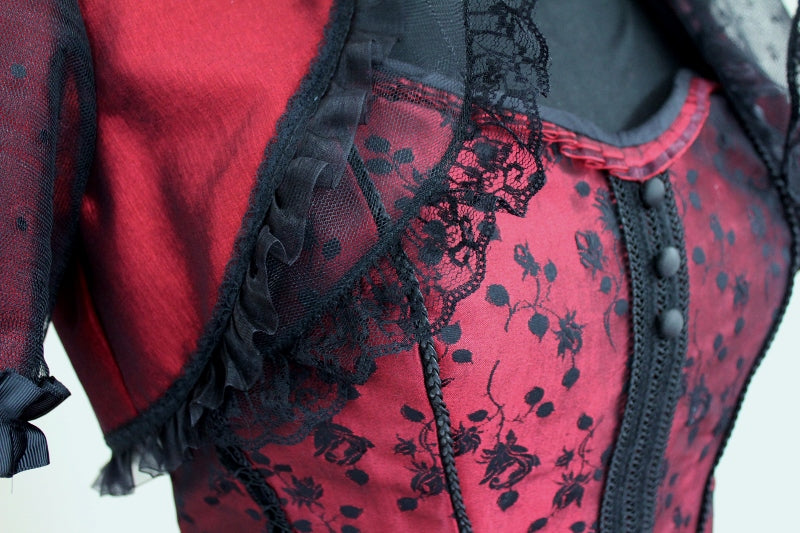
Before the three layers were sewn together, I added ruffled trim to each. The light dotted net is trimmed, with the same black organza ruffle that I used on the corset and the bolero. The red layer is trimmed with a gathered black grosgrain ribbon (I had serged the raw edge of the hem first to keep it from fraying and to stabilize it) - I also used this ribbon to trim the bottom of the sleeves on the bolero. The tutu net layer is trimmed with the same red/black shot ruffle that I used at the top, center front of the corset. I used a fairly close zig zag stitch to secure it to the net. All three trims have been used in the various pieces of this costume and all came from my stash. There is now almost nothing left of any of them - Yay!
There are several ways to make a cage crinoline and this method can make a functional and fashionable one since you make casings for the hoop steel/hoop wire. Interestingly the pattern envelope suggests using hoop connectors but they are not referred to in the instructions.
I thought I did follow the instructions fairly closely for the cage crinoline but I did use hoop connectors so I had to tweak how I made the casings for them, however as I read them now I realize that, yet again I did my own thing...because it made more sense to me to so.
So, what did I do differently?
- I used Petersham ribbon for my vertical tapes ("straps" is the term used in the instructions). No fashion fabric, so they are just black - hmmm, wish I'd added black lace along the edges!
- I did not use webbing as the only webbing I could find was rather bulky.
- I used 1" twill tape instead of webbing for the back of the hoop casings
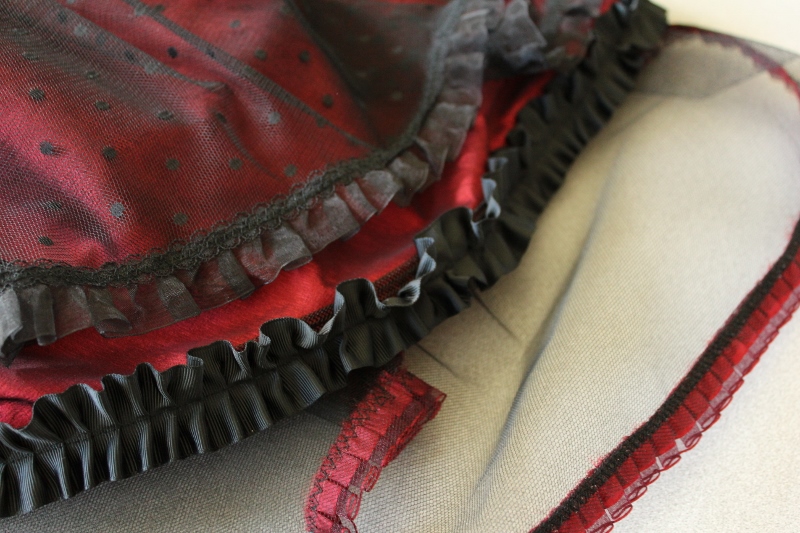
- I sewed my fashion fabric lengths for pattern pieces 20 & 21 (for the hoop casings) together at both ends to create a continuous circle. BE SURE TO TRIM THE SEAM ALLOWANCES so that the hoop wire can't catch on them when you try to feed the hoop wire through the casings
- I cut my twill tape in one length so it would have no seams. The length of the twill tape was 1" shorter than the circumference of the fashion fabric circle. I folded each end of the twill tape under by about 3/4" and zig zag stitched the raw edges down to secure them. The twill tape was then about 3" shorter than the circumference of the fashion fabric circles (both the larger and smaller one)
I have a serger and I set it to a rolled hem setting then serged the twill tape to the fashion fabric which created a dark black edge to the red/black shot fabric. Make sure the seam allowance side of the fashion fabric is against the twill tape as unpicking this stitching would be a nightmare.
The pattern instructs to cut the hoop steel longer than the hoop casing so that the ends of the hoop steel can overlap. I cut mine about 1/2" shorter because I used a hoop connector and they add a bit of length. The hoop connector has a rounded edge, that makes sliding the hoop steel through the casing easier. You can get hoop connectors at Farthingales in the Hoop Steel section.
Doing it this way means there is gap in the twill tape once the twill tape and fashion fabric are sewn together. This gap should go at the back of the cage. I aligned the center back tape to one side of the gap so that the tape could be securely sewn to the twill tape. In the image below you can see the white hoop steel with the hoop connector in the gap between the twill tape ends. This is facing the body so no one will see it and it means you can easily dismantle your cage for storage or travel. The vertical tape can be seen to the left and the red/black shot fashion fabric can be seen behind the hoop wire.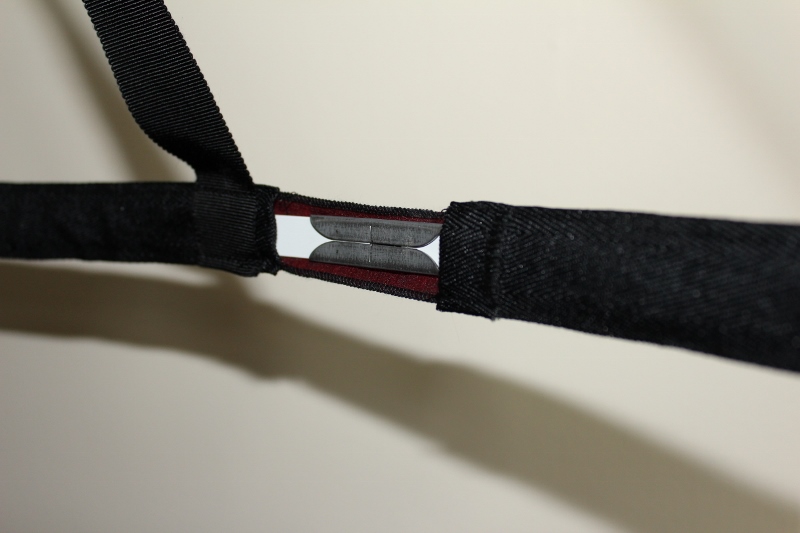
Click HERE to view a video on How to Use Hoop Connectors
I added a strip of black crystals to the top casing; I didn't have enough for the larger hoop and I'm glad I didn't. The strip of crystals was "stick-on" and the backing stuck really well to the fabric but the crystals began to come off the backing! The backing was impossible to remove once stuck on...one of the bad things about "stash". The cage crinoline is a very simple shape and was not too time consuming.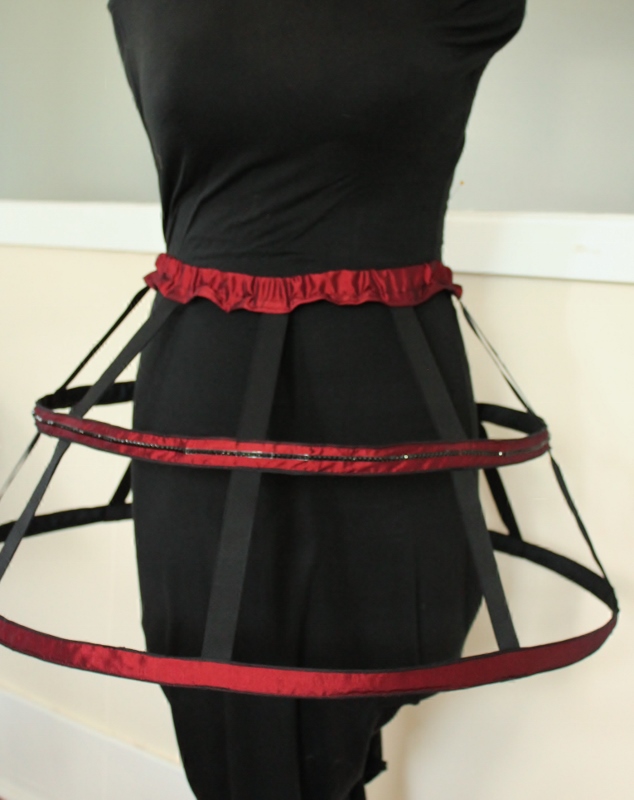
Once the skirt was over the cage crinoline it was almost impossible to see the crystals or the areas where they had come off.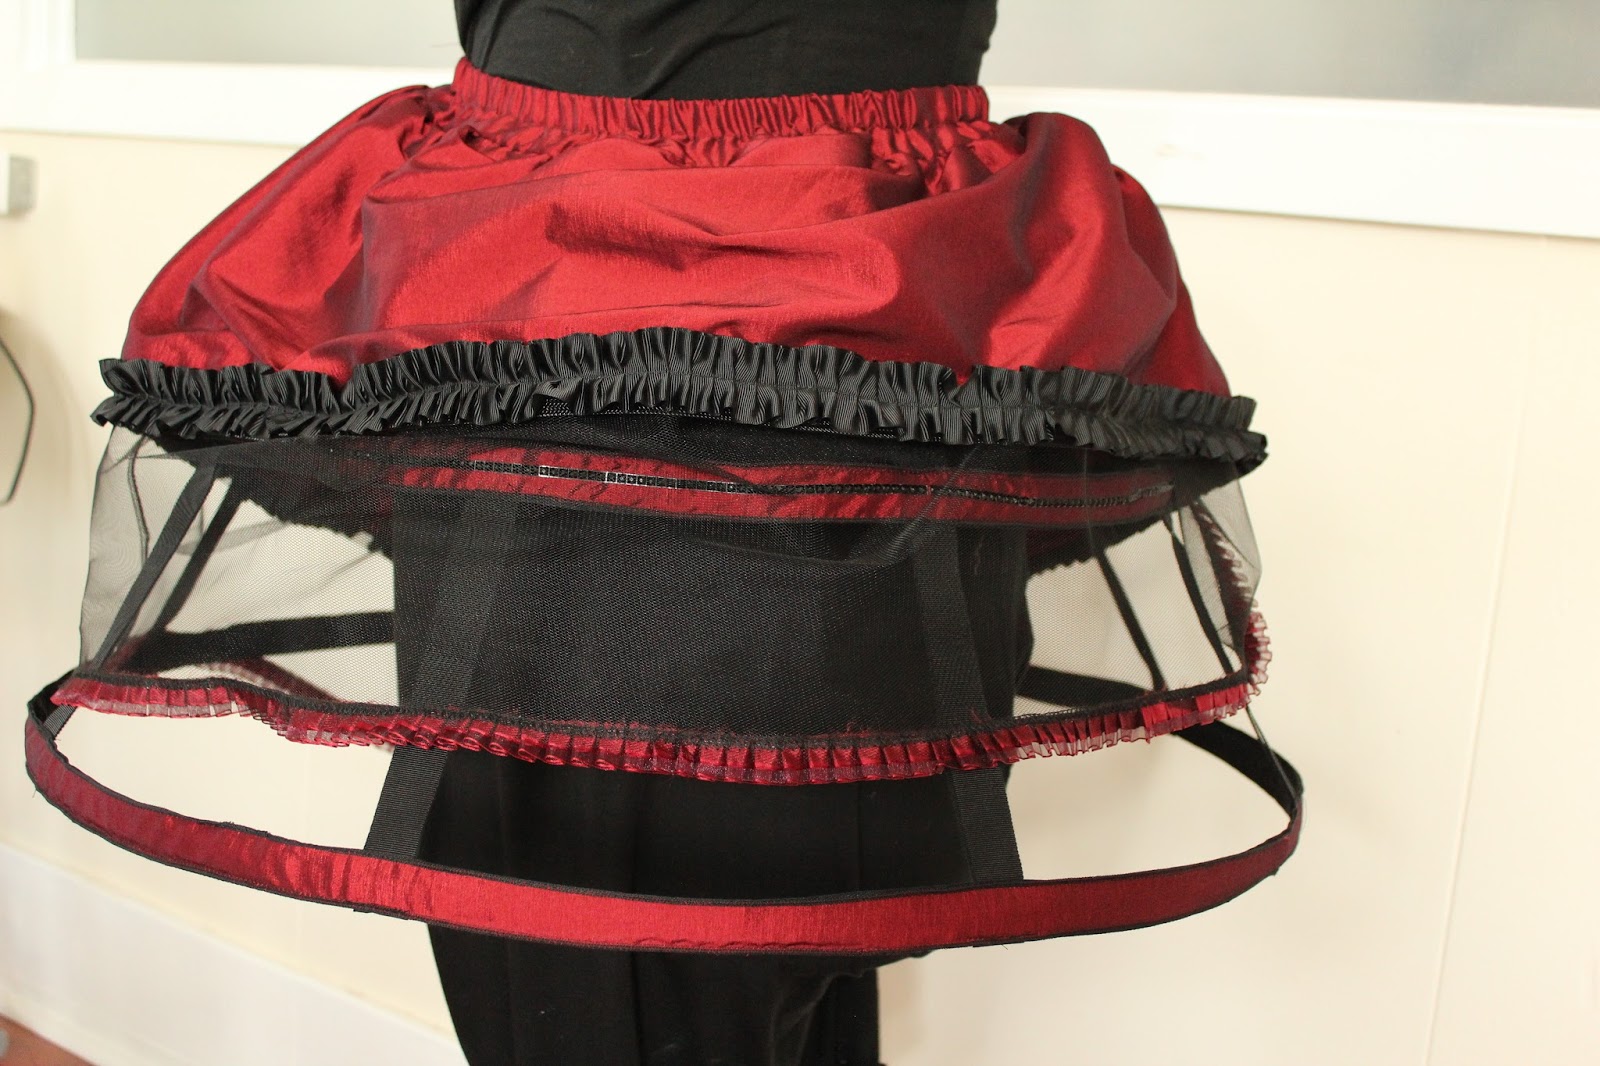
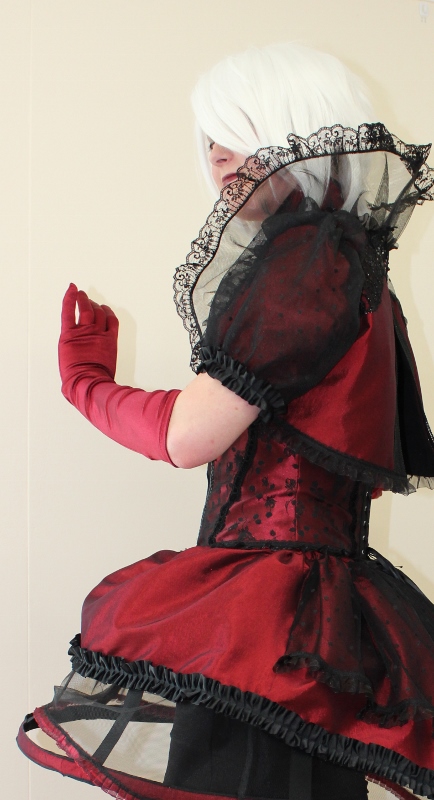
And the final result!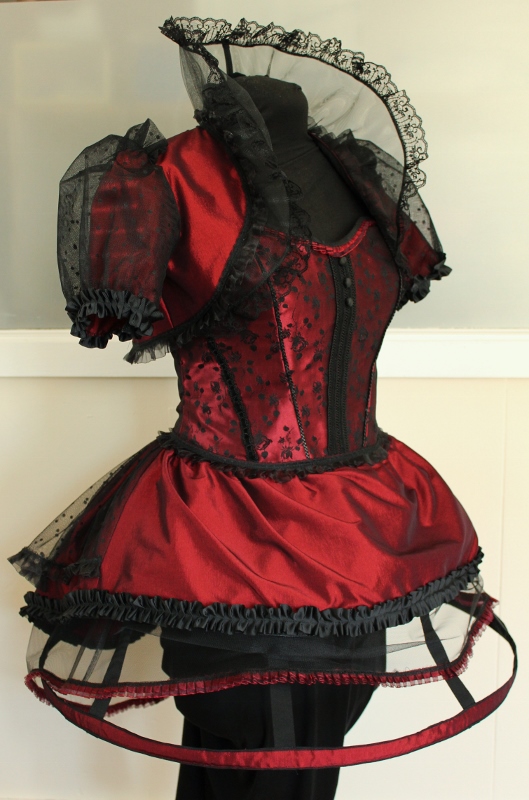
I've also been working on a Fosshape top hat and I'm trimming it to coordinate with this costume. 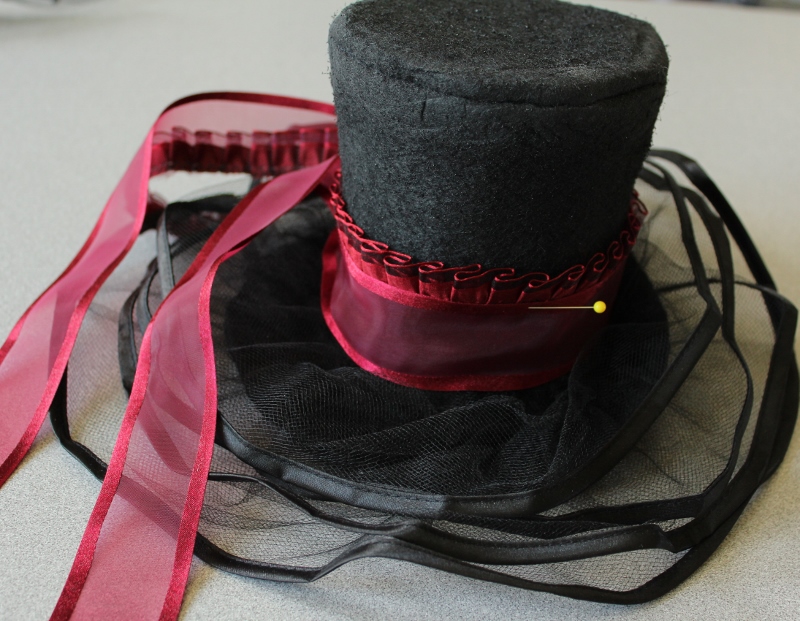
Tomorrow I'll get to see it all on a person.
Leave a comment
All comments are moderated before being published.
This site is protected by hCaptcha and the hCaptcha Privacy Policy and Terms of Service apply.