Making your own garters is simple and means you can design your own garters to!
You don't even need a sewing machine, but we've used one here.
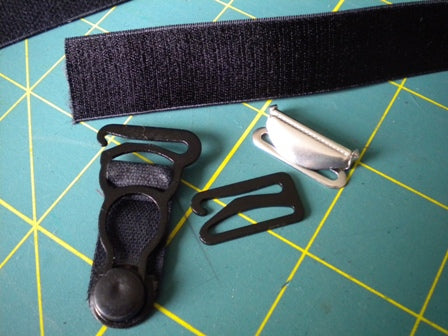
Choose your supplies, you'll need:
- elastic (how much depends on how long you want them)
- links (these attace the garters to a garment)
- garter tabs
- slides or buckles to adjust length

I've chosen black elastic, with black links, black garters and silver buckles and I've made mine longer than most people would want. You can click on the product numbers below and order each item.
All you need to make a single garter, just multiply by the number of garters you want…and it’s totally your choice. Some people like just one garter per leg and some like as many as 4. We sell supplies in “half dozen” (6 pieces) so you could have 3 garters per leg.
Cut your elastic into pieces the length desired…maybe 6 inches.
Slide one end through the enclosed hole in the link and stitch it.


Slide the buckle onto the elastic with the “flap” on the “right side” or satin side of the elastic. The elastic should be between the “teeth” and the bar and not through the silver loop.

Next, hook on your garter, or if you’re not using a detachable version slide it on to the elastic.


Now take the end of the elastic (that does not have the link sewn onto it) and thread it through the back of the buckle…through the silver loop.

Sew the cut end of the elastic so that it is permanently attached to the silver loop of the buckle.


Your buckle should look like this:

Adjust the length of the garter to where you think you want it and them close the buckle “flap”.


Your garter is ready to wear. If you need to adjust the length, just open the buckle “flap” and slide the elastic to where you want it then close it.
Always remove your garters from the garment before laundering. This is really easy when you use a “link” at the top.


Leave a comment
All comments are moderated before being published.
This site is protected by hCaptcha and the hCaptcha Privacy Policy and Terms of Service apply.