

Regency Corset Pattern 1800-1820

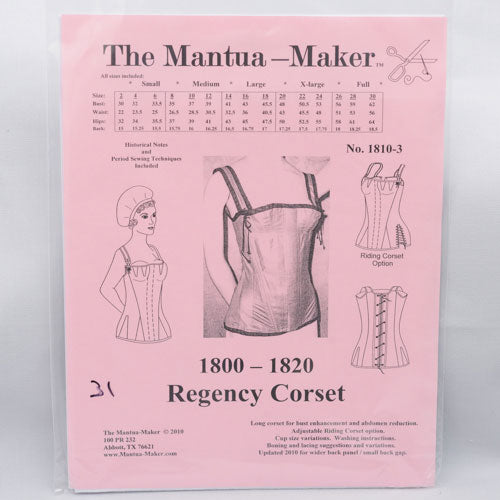
Farthingales now stocks a Regency Corset Pattern and a Regency Corset Kit. The pattern is produced by "The Mantua Maker". Sizes 2 through 24 come in one pattern envelope and fit bust sizes 30inch (76cm) through 53inch (135cm). This pattern and kit is NOT for the novice sewer. To have success with this pattern you should have experience with sewing gussets and with binding right angle edges.
I did not sew this sample up myself as my time is becoming limited. I hired an experienced costume seamstress who has excellent skills and it took her in excess of 15 hours in sewing time by following the instructions. We both believe this time could be shaved down to about 10 hours or less by someone with experience who is using the instructions only as a guide. The pattern pieces fit together beautifully! And we were very happy with the end result however my seamstress found the instructions incomplete, the writer assumes the sewer has basic construction knowledge. We always approach testing a pattern as if we know very little and if this is the case then you will have difficulty. We recommend that you read the instructions over carefully and make notations, there are lots of extra bits of historic information included and the illustrations are quite good. We also suggest that you rely on your own experience and understanding of the fabrics you are using to adapt techniques and not always follow the instructions to the "T". Sizing of this pattern like any other should be checked against your body measurements before the pattern is traced off or cut out. We built a size 14, which is supposed to fit a 41 inch bust, however the finished bust measurement is 29". We do not make any alterations to the patterns we test and we make all patterns in size 14, this pattern tends to fit well in the front but be very narrow in the back which would not be a difficult alteration to make consider the seam placements. A four inch gap between the two centre backs is an acceptable gap for this time period. Illustrations in the instruction sheets suggest the centre backs will meet, this was done to illustrate the lacing technique not to indicate fit. The illustrations also suggest the shoulder straps will fit over the shoulder much like a bra strap would, this would not have been the case. Fashions at the time revealed a great deal of neck and shoulder and the corset is cut to accommodate the fashion. The shoulder straps will splay out over the shoulder crest. Overall we like the finished result but it was a struggle to get there when approaching it from a novice perspective. This corset pattern should be attempted only if you have at least 15 hours or more of sewing time available. Always make a "mock-up" in scrap fabric for any corset you are making for the first time in order to test fit.
Regency Corset 1800-1820
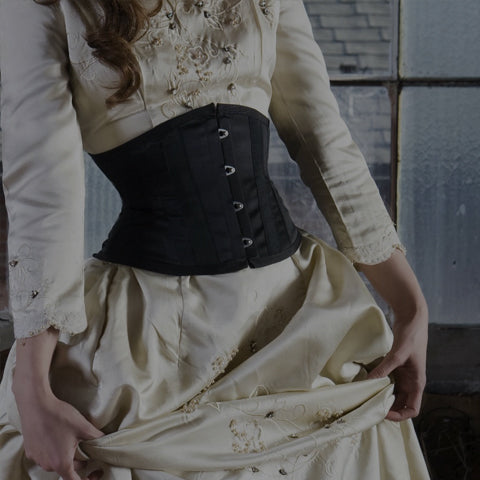
We built the "Riding Corset" version of the Regency Corset
#00-pattern-31
|
Using 74-1150-01 satin coutil as the shell fabric and #74-1141-01 inside with an interlining of padding to minimize the visibility of bones on the satin. We wanted a more interesting look so we trimmed the corset with black satin, black eyelets and black corset lacing. We followed the instructions for single cord lacing and agree with the designer that this is a very difficult lacing technique and we would likely never use it due to extreme inconvenience. Note the wrinkles happening in front, we used bones only in the in the back and in the two side-front seams. Decorative stitching was often used to help support the front of corsets of this time period, you can add this detail or you may wish to add extra boning. The effect may be less obvious on a human body, foam breasts can only be shifted a limited amount. * notice the width of bare shoulder |
 |
|
As usual we did modify some of the methods of construction.We did not include padding in the gussets. Bust gusset openings were marked with a tracing wheel and stay stitched before cutting. Meaning we stitched along the tracing wheel marks, then we clipped to the corners, folded the seam allowance back along the stitching line and pressed the seam allowances to the inside. Pinned the gussets into place and topstitched close to the pressed edges. It's hard to make this make sense without the pieces in front of you but it's important to be aware to pay close attention to this part. The laced hip gussets also require consideration and patience. Instructions for these are very limited as are the instructions for binding the various corners and angles of which the laced hip gusset is the biggest challenge and requires good hand work skill. Bias binding needs to be 2inches wide.
|
 |
This is our first pattern by "The Mantua Maker" and we will be testing others in the not too distant future. Patterns are printed on heavy blueprint paper so they are durable. Pieces are well drafted and fit together without difficulty, only concern I had was with the fit but perhaps I should follow my own advice and always measure the pattern first….not after! And as with all Historic patterns - the fit is different from modern day garments. If you are an experienced seamstress you likely do little more than glance through the instructions if even that, you will not have a problem provided you do understand gussets and binding.
We Suggest the Following Products For This Project but there are many items to choose from, click on the links to see more.
| PRODUCT NUMBER |
PRODUCT DESCRIPTION | WHERE USED | REQUIRED QUANTITY |
Link to product pages |
|---|---|---|---|---|
| 00-PATTERN-31 | pattern, Regency corset 1800-1820 | Pattern | 1 EA | |
| 74-1141-01 | coutil English, white Soft 55" fine herringbone (140 cm) | Corset lining | 1 M | |
| 74-1141-20 | coutil, English flesh, 55" fine herringbone | Corset lining | 1 M | |
| 70-7206-01 | white satin ribbon, white | Lace up back | 6 M | |
| 20-7070-00 | shrink tips, clear 1/8" to finish cord ends | To tip lacing | 1 FT | |
| 50-8518-36 | bones spring steel/pc. 18 mm x 1 mm x36 cm (14 3/16") | Busk center front | 1 PC | |
| 50-8206-36 | bones spring steel/pc. 6 mm x .6 mm x 36 cm (14 3/16") | Corset | 8 PC | Spring Steel Bones |
| 50-8206-14 | bones spring steel/pc. 6 mm x .6 mm x 14 cm (5.5") | Riding version | 4 PC | Spring Steel Bones |

Leave a comment
All comments are moderated before being published.
This site is protected by hCaptcha and the hCaptcha Privacy Policy and Terms of Service apply.