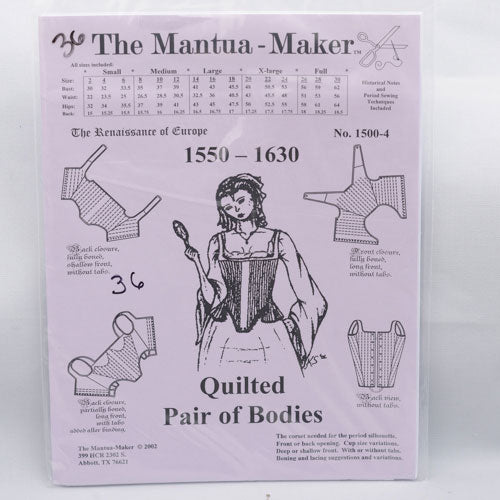
Instructions for The Mantua Maker Elizabethan Corset Pattern

Instructions for The Mantua Maker Elizabethan Corset Pattern

Elizabethan Corset – Pair of Bodies

Pattern # 00-PATTERN-36 By The Mantua Maker


Cut out your pattern pieces, you will need a shell and a lining layer. Be very careful where you cut, there are different lines depending on whether you have a front opening corset or back opening corset. There are also lines to accommodate various cup sizes so be sure to mark your cutting lines before you cut the pattern.

Draw the casing lines onto the right side of the lining layer of fabric, having first marked on seam allowances all around each piece. It is important to draw the lines on the right side of fabric, so that you'll be able to see them when you go to sew them. The bone casing widths are not given in the pattern; we decided on half inch wide bone casings to accommodate 7/16" wide spiral steel bones or 11 mm spring steel bones. We started our bone casings at the center front and center back and boned the whole corset – you may choose to use fewer bones.

After all bone casings are marked pin center fronts together, using one shell layer with one lining layer - right sides together.

Stitch the center fronts seems together, as pinned. Press the stitching. Press the seam open. Fold the pieces back with the wrong sides together and press the center front seam closed. Mark the channel that will hold the grommets, just to hold the space for later. You don't want to accidentally put a bone in the grommets section. Stitch the strap extensions – be sure they are on correctly – check the pattern.


Stitch side seems to side seams of back panels. Stitch the side seams securely as there is a lot of stress on these seams – particularly at the bottom edge. You now have a loop of fabric pieces as indicated in the photo below.


Lay the sewn garment flat on the table with center fronts to your left and right. Pin the layers together matching all seems and all edges.


With lining side up stitch your casing lines. This can be mind numbing, but stay focused as it's important the lines are straight and dead on the drawn lines. It will not only look better, but will limit the risk of casings that are too tight to fit bones into.


Trim the bottom edge of your corset to half an inch or quarter-inch to prepare it for binding with biased tape or bias cut fabric. The amount you trim off will be decided by the width of your bias binding and the method you choose to bind the edge.


After trimming the bottom edge, bind it with bias binding.


Photograph shows a bound bottom edge with bones in place.


Once you have finished your bottom edge you can slide bones into the casings. Note: bones should be quarter inch shorter than the finished length of the casing. You may have to cut bones to fit. You can see here that some bones were cut and then "U" tips were applied.


Once all bones are in place, it's time to bind the upper edge. Be sure all bones are pushed down as far as possible. Trim the top edge as you did the bottom edge. Use a zipper foot and stitch the bias tape to the shell side of the garment with raw edges aligned. Front edges of bias tape should have been folded back to create a finished edge at center front or center back.

You may wish to add decorative stitching to the shoulder straps. This helps to strengthen them and give the more body


This photo shows a completely bound strap (right) and a partially bound strap (left). Binding the corners where the straps meet the main body can be a challenge - work carefully. This works best when done by hand.


The last step requires the setting of grommets. Grommets have been set here down the center front and in the strap and bodice.

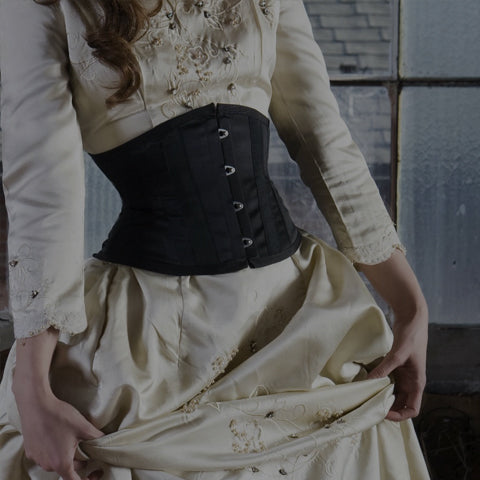
The white corset on the left-hand side below has been boned with spring steel bones #50-8511 series. The corset on the right hand side of this page has been boned with wide spiral steel #28-8001-96 and each piece was cut to size and tipped with "U" tips. The spiral steel corset is more flexible and more comfortable, but it is much heavier. The spring steel corset while lighter is more rigid and less comfortable. Both corsets create the shape that is required by the time period. The straps on the white corset have been tied traditionally with laces. The straps on the flesh colored corset have been attached with elastic, leaving the grommets on the straps for design purposes. The lacing allows for more adjustments of the straps but my experience is the laces come undone. The elastic allows comfort of wear, with no risk of lacing coming undone. The white corset has been neatly bound top and bottom as described in the process above. The flesh tone corset has been finished simply with a zigzag stitch to bind the top and bottom edge. This is not as neat a finished edge but it means the whole corset can be sewn by machine with no hand work required. The arm hole was bound for added strength and comfort. If you are going to use the zigzag stitch to finish the bottom of the corset it is easier done before the pieces are sewn together. Note: binding the edge makes for a stronger corset as the binding helps hold the side seams together when under stress.

Corset boned with spring steel #50-8511-Series This corset has 64 bones! You can make yours with fewer.

Corset boned with 7/16" spiral bones #28-8001-96 each piece had to be cut and tipped.

Two spring steels (50-8511-34) were used down the center front to support the grommets and maintain a nice straight line. This took 9meters (10yds) of 7/16" wide boning and 134 "U" tips!

NOTE: despite the weight of this when you pick it up, it is surprisingly comfortable and does not feel heavy when on the body.

We used the following products to make the two Elizabethan Corsets above, you may need more product or less depending on the size. It's always best to buy a pattern first and make a mock-up of scrap fabric to determine what you will really need.

We Suggest the Following Products For This Project:

PRODUCT
NUMBER
PRODUCT DESCRIPTION WHERE USED REQUIRED
QUANTITY
Link to product page
00-PATTERN-36 pattern, Elizabethan Corset 1550-1630 pattern 1 EA
74-1141-20 coutil, English flesh, 55" fine herringbone Corset Fabric 2 layers 1 M
74-1141-01 coutil English, white Soft 55" fine herringbone (140 cm) Corset cover (alternate choice) 1 M
54-8600-AB eyelets antique brass, size #00 Findings, need 32pc, sold by the gross (144pc) only 1 GR
54-8600-WA aluminum washers go with eyelets size #00 Findings, need 32pc, sold by the gross (144pc) only 1 GR  

Reading next

Leave a comment

All comments are moderated before being published.

This site is protected by reCAPTCHA and the Google Privacy Policy and Terms of Service apply.