Basic Grommet Setting Tips
- Always test your setting technique on scrap of the same fabric and same number of layers.
- When hammer setting, always work on a stable surface which will not flex with the pounding of the hammer. The floor is the best surface but can be awkward.
- Work slowly and carefully. It is impossible to "unset" a grommet.
- The grommet goes on the "right side" or "outside" of the garment and the washer goes on the inside.
- Always use a washer!
- Only use rubber or rawhide mallets.

Grommet Machines
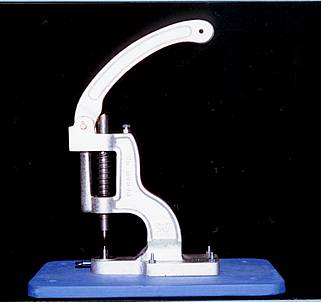
The grommet machine sets grommets perfectly and with ease. It is however quite large and not to be considered a mobile unit. It requires three screws in order to be mounted onto a table. As it functions on the principle of leverage it must be mounted on a table in order to work effectively.
THIS MACHINE IS NOT CURRENTLY AVAILABLE HERE BUT I HAVE INCLUDED THE INSTRUCTIONS FOR ILLUSTRATION PURPOSES.
INSTRUCTIONS
SETTING GROMMETS
A) By Machine |
|
 1. Punch hole in fabric |
 2. Place the washer over the spike in the bottom die. It is slightly concave on one side and this side should face upward. Pretend it has to hold a drop of water. |
 3. Fit the grommet through the hole in the fabric. Place the grommet and fabric onto the spike of the lower die, fabric side down. |
 4. Slowly pull the lever down so that the grommet sets evenly. |
|
|
|
B) With Pliers |
|
NOTE: We have found that the shank of grommet is not always long enough on this kit and that a rough finish can result. This could be uncomfortable next to the skin and a placket may be required to finish the garment. |
|
C) With Hammer Punch Tool |
|
|
Hammer Setting Kits require a rubber or rawhide hammer which is NOT included.
|
|
|
 |


Leave a comment
All comments are moderated before being published.
This site is protected by hCaptcha and the hCaptcha Privacy Policy and Terms of Service apply.