


Eyelet Setting Instructions
(Similar instructions are included with the Eyelet Setting Kit #54-8600-kit)
Hammer Setting Eyelets
If you have ever set grommets using a Hammer Setter you will notice that the Eyelet Setter appears to be missing a piece; the base. We actually did call the manufacturer to confirm that all the pieces are here and they insisted there was no base piece to be had.
- Be sure to have a flat piece of wood or heavy. thick plastic to protect your table/surface.
- Test your setting method on scrap fabric that replicates the project you will be working on.
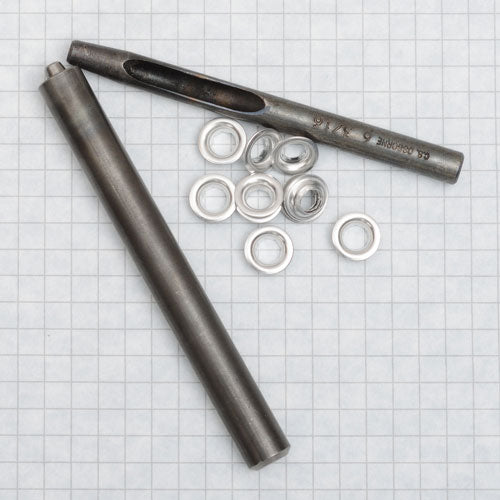
- Make the hole using item #54-8600-cutr and a rubber or rawhide mallet.
- Take the eyelet and push the shank into the hole until the eyelet is in place.
- Place the eyelet on a solid, hard surface, the floor is best. Your fabric will be on top facing the ceiling with the eyelet underneath, almost hidden from view.
- Take a washer and place it over the shank of the eyelet, the eyelet and washer will be shank to shank.
Press gently until the washer is stable. - Center the Eyelet Setter (#54-8600-set) over the washer hole, the shaped end should fit neatly into the hole of the washer.
- Hold the Eyelet Setter steady and bang a few times with the rubber mallet.
Remove the Eyelet Setter and you are done.
NOTE: If the surface you are working on is not hard the eyelet may not set evenly and you will end up with little eyelet indentations in the surface of your table.
ALWAYS test the process on scrap first.
Eyelet
Grommet Setting Instructions
Using hammer set style tools; kit # 60-8810-kit (for #0 size grommets) or #54-8800-kit (for #00 size grommets).
You must have a rubber or rawhide mallet.
- Punch a hole in your fabric using the "hole punch" and rubber mallet.
- Place the grommet on the setting base, it should fit neatly in place.
- Place you fabric on top of the grommet, being sure that the grommet shaft is coming up through the hole in the fabric.
- Take the washer and slip it over the grommet shank, curved side upwards.
- Center the setting tool with it’s "nose" going through the holes in washer grommet and base.
- Strike with the rubber mallet two or three times
- Check the set of the grommet, re-position and strike again if needed.
ALWAYS TEST ON SCRAP FABRIC FIRST
You cannot remove grommets once they are set or even partially set so be careful.

Leave a comment
All comments are moderated before being published.
This site is protected by hCaptcha and the hCaptcha Privacy Policy and Terms of Service apply.